
Since getting married a couple of months ago I’m slowly getting back into the ‘swing of things’! It has been a busy few months as I have also left my school of nine years and will be starting a new role in January. The handover process took quite some time!
![]() This post differs from my other posts as it is about more of a personal project rather than a school one. It is equally as geeky however and I will be investigating how this can be simplified into a school project around ‘Automating your Home’ in the future. Hopefully you will find it interesting! As you can imagine, married life brings about new challenges and in our household, the first of which was the big question . . . How do we control our new reclining sofa from our mobile devices? Pushing a button next to the seat just seemed too easy for us, so we (mostly my husband) set out on a project to take control over this small part of our living room.
This post differs from my other posts as it is about more of a personal project rather than a school one. It is equally as geeky however and I will be investigating how this can be simplified into a school project around ‘Automating your Home’ in the future. Hopefully you will find it interesting! As you can imagine, married life brings about new challenges and in our household, the first of which was the big question . . . How do we control our new reclining sofa from our mobile devices? Pushing a button next to the seat just seemed too easy for us, so we (mostly my husband) set out on a project to take control over this small part of our living room.
We bought the new sofa from DFS back in September knowing it would not be delivered until after we returned from our honeymoon in November. My husband, Kevin, likes a challenge and thought about controlling it with our Raspberry Pi using the GPIO pins. First he bought a solid state relay module which he powered from the Pi so no external power was needed. Unfortunately this type of relay typically only works with AC current as they switch off at 0 volts so we were not able to use them. He therefore had to buy a normal relay module; this requires 72 mAmps per relay (504 mAmps total) so required an external power supply.
Next, Kevin needed to turn the Pi into a web server so he could access the sofa controls over our home network. He decided to use Ruby to build this as it met all the requirements. Ruby uses modules, known as ‘gems’ and he used the Pi_piper gem, which is widely used to control GPIO pins, and the Sinatra gem to create a RESTful API. The plan was to keep the sofa switches independent and use the Pi as a secondary controller accessed using a smartphone app.
Then the big day arrived (no, not the wedding day, although that was pretty big too . . . but “Sofa Delivery Day!”), before the delivery truck had pulled out of the road Kevin had the sofa on its side and enlisted my assistance to document the pin outputs from the din connectors. At this point we discovered that due to the pin layout it was not possible to keep the relay module and the sofa switches connected at the same time due to the pins being grounded when they are not in use. The only alternative was to plug all the switches into the Pi so that the Pi now has complete control over the sofa.
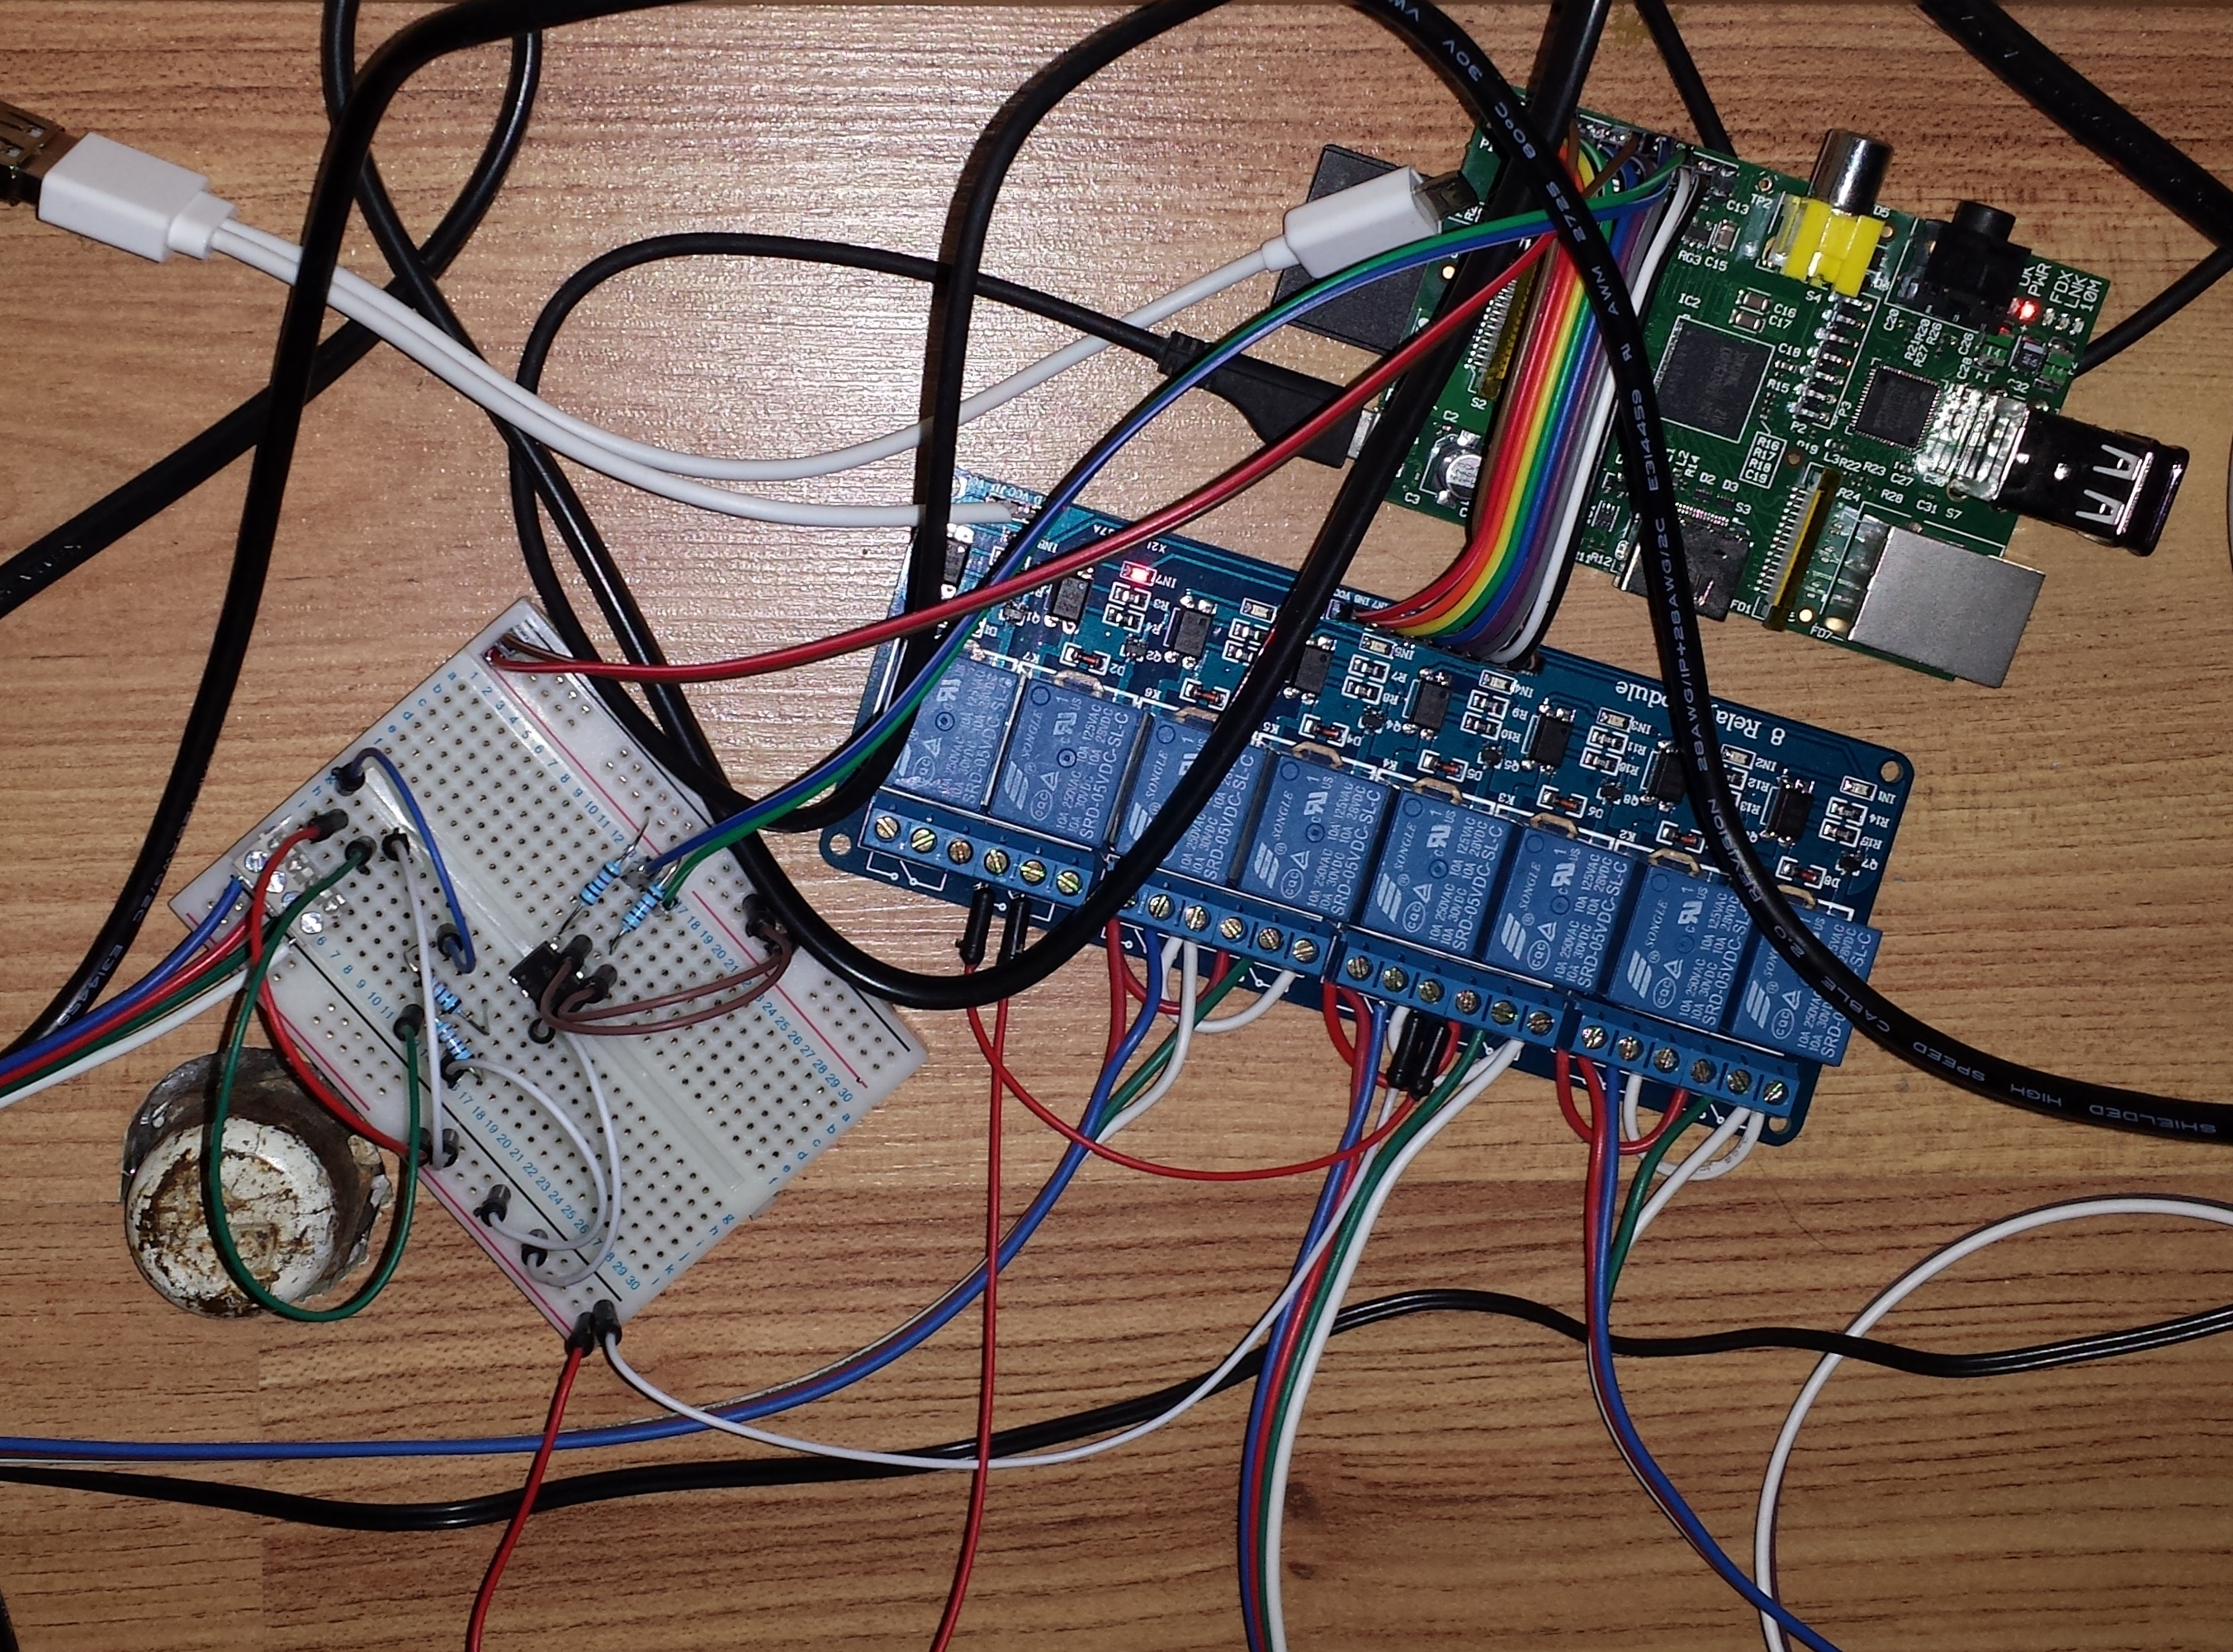
Prototype using a breadboard
Of course with this new method it was important to protect the Pi from the high voltage of the sofa. We used optocouplers to separate the voltages and detect button presses. The sofa position is tracked using time from the upright position. This isn’t perfect but without adding sensors it was the best way possible. Now he understood how the whole system would work Kevin planned Version 1 on a breadboard using Fritzing and used their fabricate service to have the circuit board manufactured.
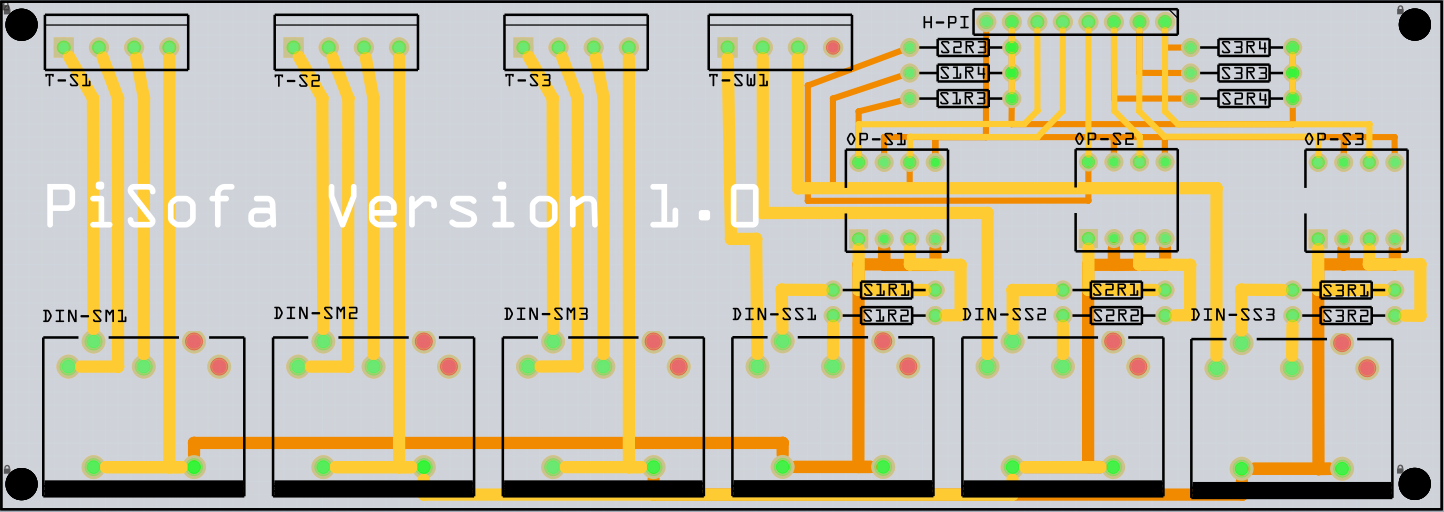
PiSofa V1 circuit board design in Fritzing
The board arrived on 23rd December so on Christmas Eve, while I was cooking up Christmas delights in the form of mince pies, Kevin set to work wiring up and soldering the circuit board.

Version 1 of the PiSofa set up behind the sofa
The end result: We now have a fully functional reclining sofa that we can control using an app on our smartphones (and Kevin’s new Pebble Smartwatch!)
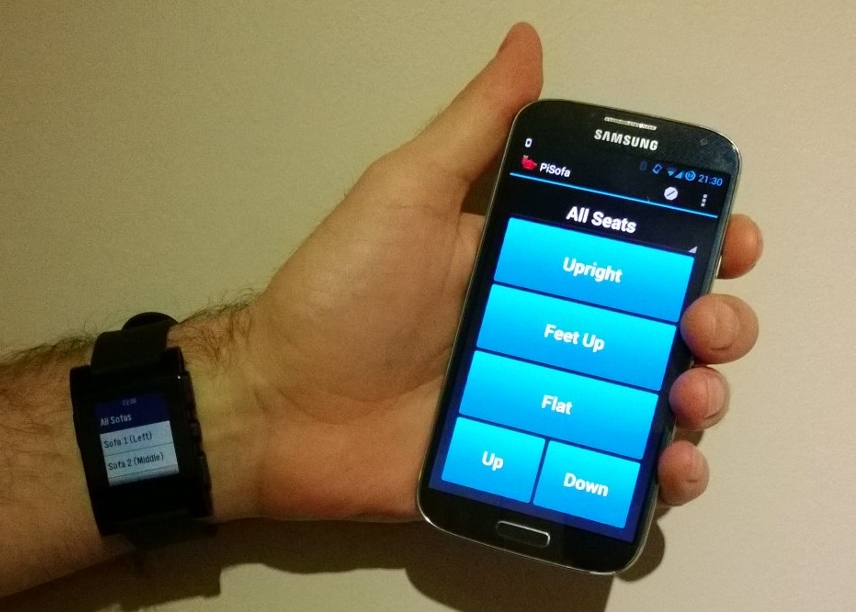
Kevin modelling the apps he made on his phone and new Pebble smartwatch
The apps are quite simple; they send web requests to the API which switches on relays to move the seats on the sofa. We have even incorporated a few extra modes such as “Crazy Mode” in which the buttons control random seats and “Parental Mode” to deactivate the sofa’s physical buttons (we’ll be trying this out tomorrow when entertaining our young nieces!). To read the full documentation for the project click here.
Future Improvements
Kevin is currently working on an improved version of our PiSofa now he has a better understanding of the electronics involved. These improvements consist of the following:
- Removing the 5 pin din connectors on the Pisofa board as they are big and take up a lot of space
- Removing the optocouplers (the voltage doesn’t fluctuate so can be correctly managed with a voltage divider circuit instead)
- Replacing the large overpowered relay board with lower powered 5mm relays. These run at just 34 mAmps each (238 for all 7). This means the PiSofa board could be powered directly from the Pi
- The new board will attach directly to the Pi and the board size will only be 2mm bigger
So far, the new circuit board design looks like this:
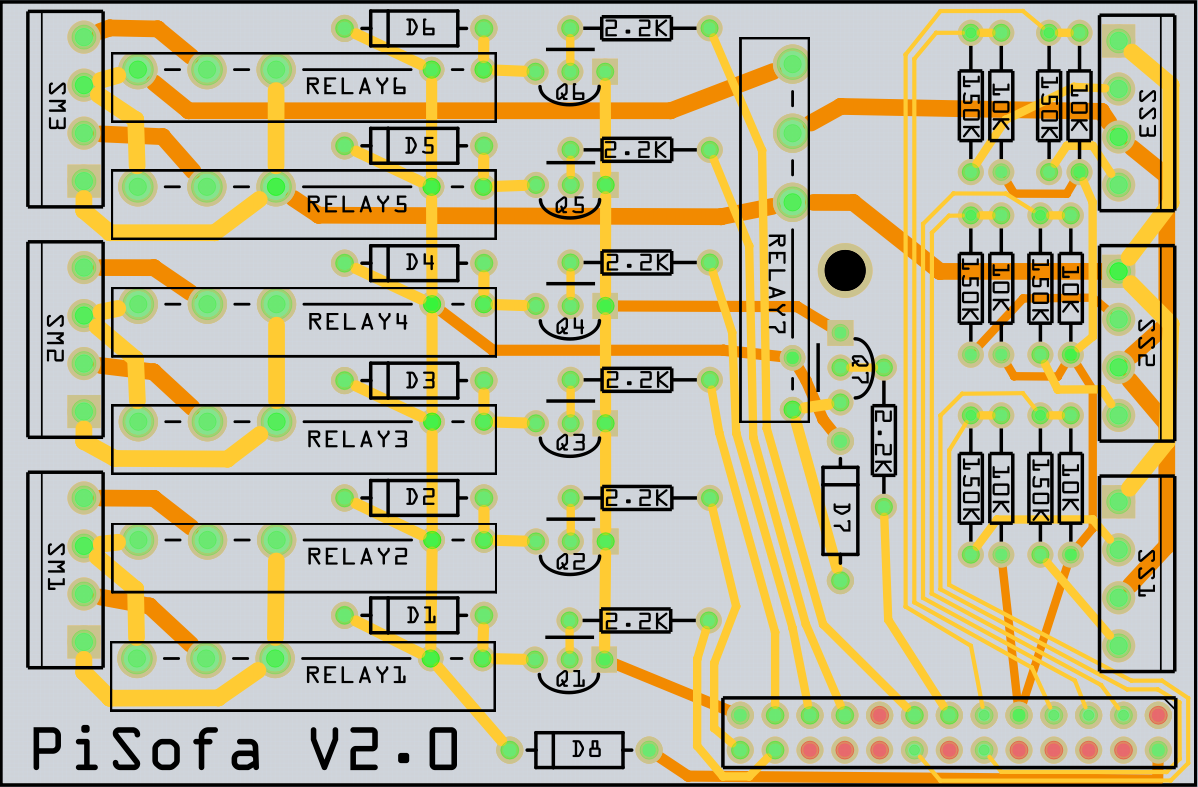
PiSofa V2 Circuit Board in Fritzing (currently a work-in-progress)
Pingback: Raspberry Pi Controlled Sofa @Raspberry_Pi #piday #raspberrypi « adafruit industries blog
Really nice read! Planning on doing something like this really soon whereby i will build the actual sofa itself which will have an audio transducer built in which will kick in when watching a movie or playing a game. Anyways thank you, at least now i have somewhere to start!
Thanks for the feedback! Hope your project goes well!
Nicki
Hi,
This is a great idea, did you ever get the new circuit up and running?
Thanks
Matt