
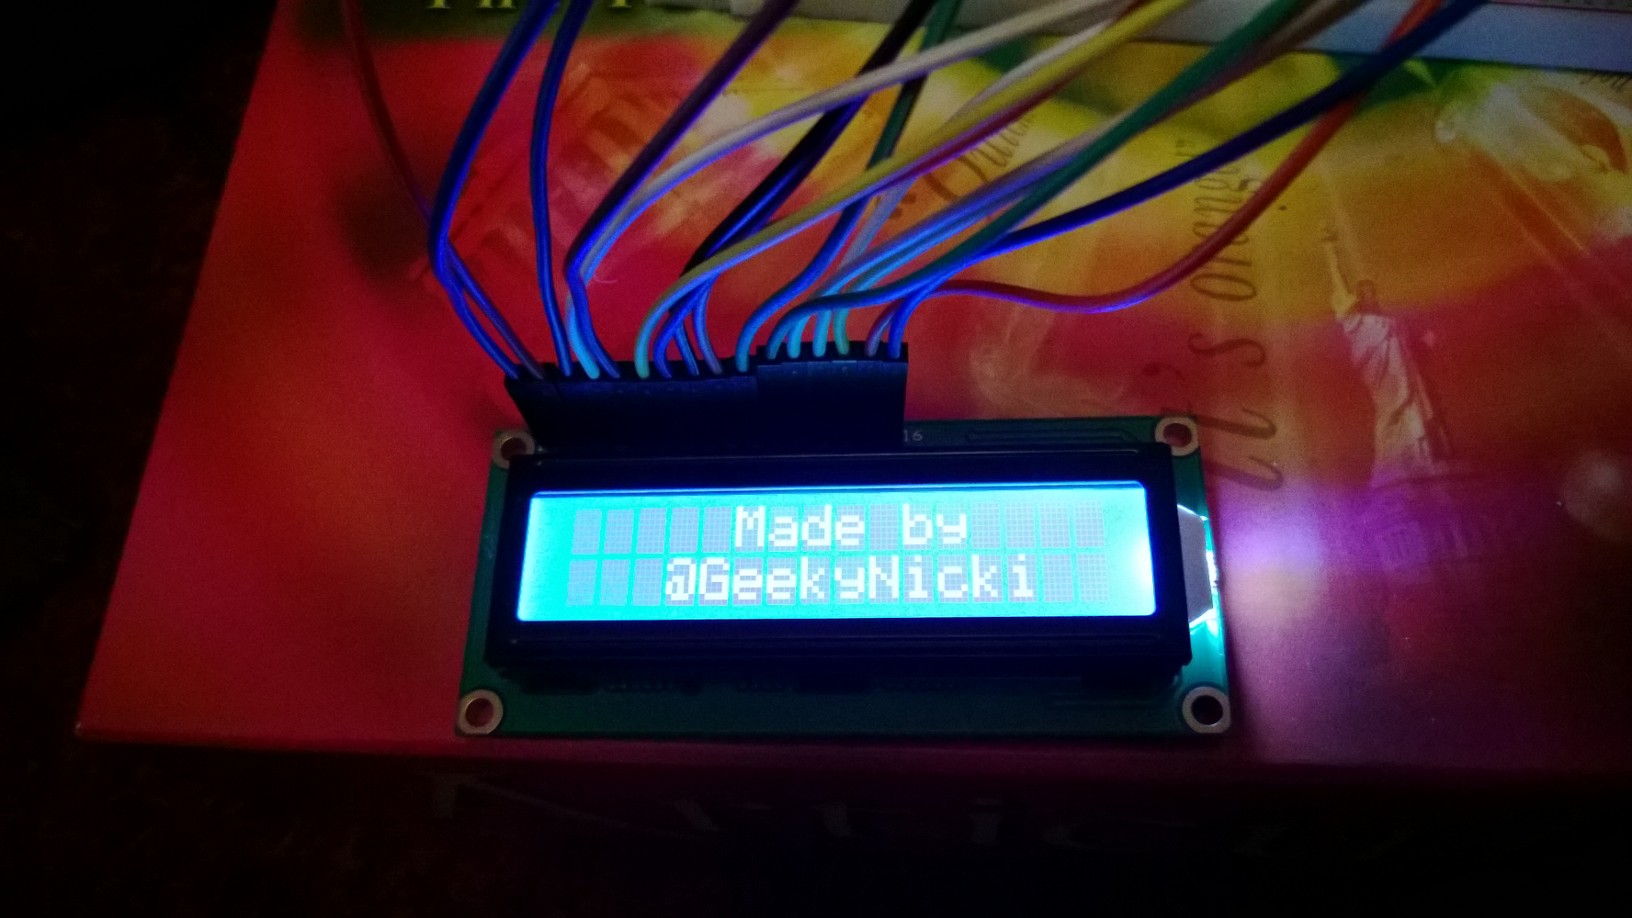
 For Christmas I received a number of “toys” to play with from my husband. One of which was a geeky box of goodies for my Raspberry Pi that includes a breadboard, wires and an array of other electronic components including LEDs, resistors and an LCD screen. I immediately decided that the LCD screen was to be my first Raspberry Pi Project (as I really can’t take any credit for the PiSofa)
My first job was to solder some connection pins onto the LCD screen so I could connect it to the breadboard and Pi using jumper wires. I followed this guide online to get me started but modified some of the wiring slightly. In the guide they used the LCD in 4-bit mode but I changed my wiring to set it up in 8-bit mode instead. I also later discovered that I needed some control over the contrast pin so wired in a potentiometer to allow me to adjust the contrast. This is how my wiring looks:
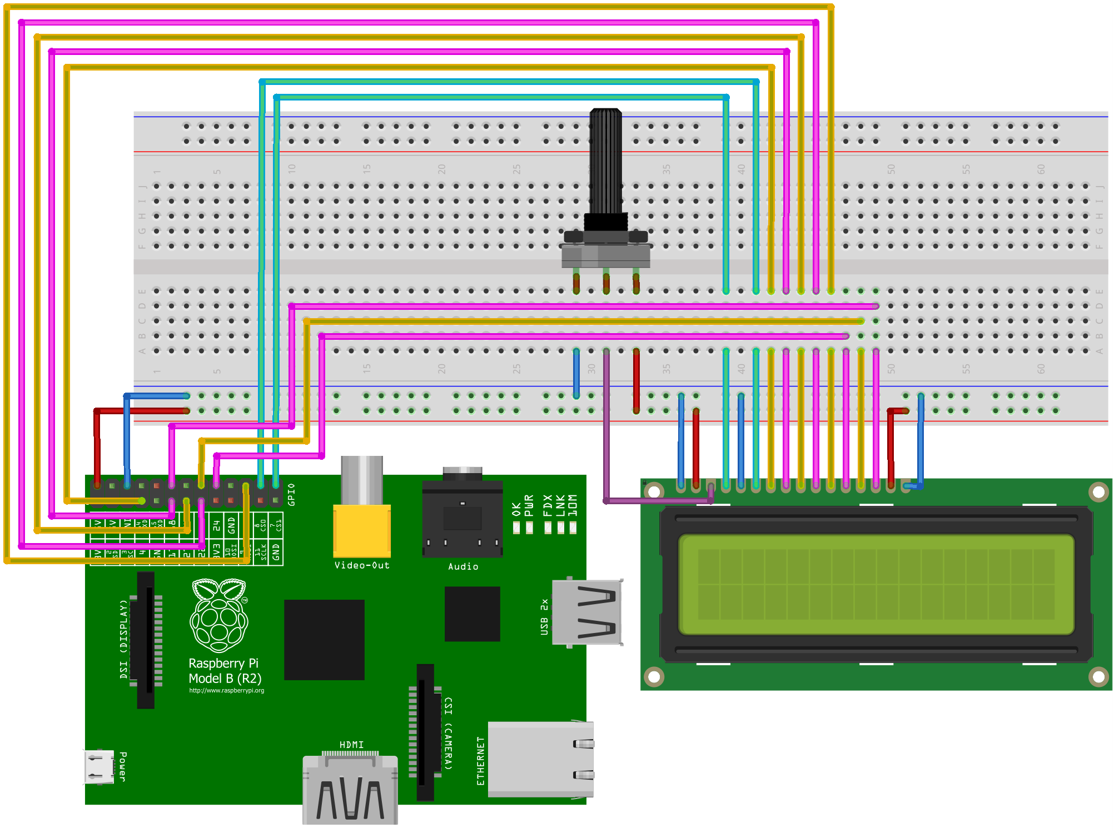
Wiring diagram for LCD screen and Raspberry Pi
To initialise and set up the screen I used another guide to gain an understanding of some of the initialisation commands and created a bash script to set it all up and check it was working; this revealed a few wiring problems, and was also the point at which I added the potentiometer as the contrast was making it difficult to read my test letter “A”.
Now it was time for my main mission which was creating a Python program to control the LCD screen. First I worked on creating a program that simply mimicked the bash script, as this was quite untidy I set to work on reducing the amount of repeated code using functions to set pins using binary. In the original guide I had seen the data was set in hex but I prefer using binary as I understand the logic behind it more than using the hex data. Especially as I essentially just want to send True or False commands to the pins.
By this time I had found an even better guide that told me what commands could be sent to the screen for initialisation and what they all meant. To initialise my LCD screen I am doing the following:
- Setting all pins to output
- Setting all pin values to false
- Sending the code 38 in hex/56 decimal – Setting the LCD to 8-bit and 2 lines
- Sending the code 1 in hex/decimal – Clearing the LCD display
- Sending the code 0C in hex/12 decimal – Sets the display to on and turns off the cursor
- Sending the code 6 in hex/decimal – Sets the screen to entry mode
Below is how my initialisation function looks. I should note that prior to this I imported the GPIO and time libraries and declared the locations of each of the pins, setting up the data pins as a list/array.
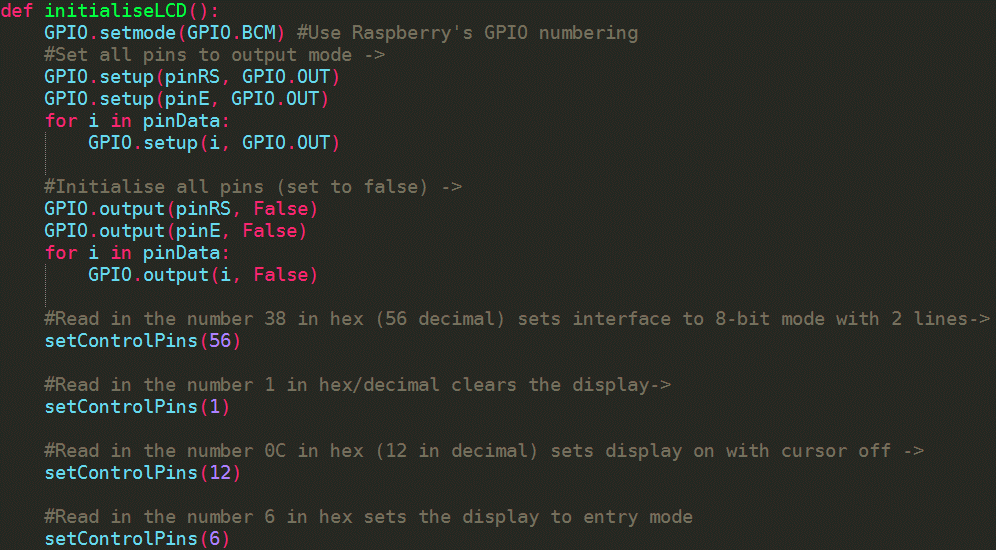
LCD initialisation sequence in Python
As you can see, this initialisation function calls another function to convert the integer values to binary, which in turn accesses a function that sets these values on the LCD screen. These functions looks like this:
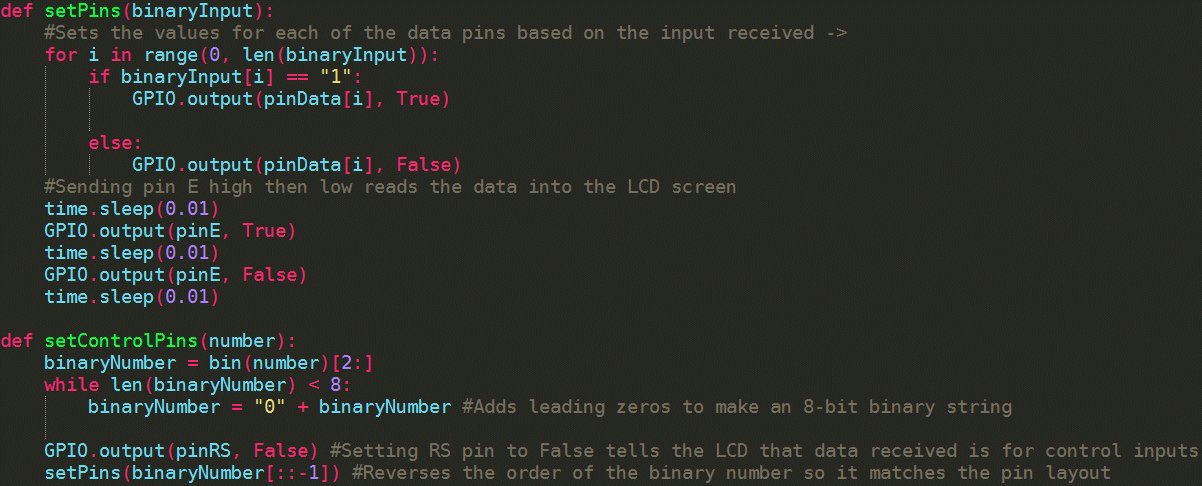
Functions to convert to binary and set the control pins on the LCD screen
After the initialisation sequence the screen is ready to display some text, I made a function that reads in a text sequence along with the line number, converts each character to binary then sends this value to my existing ‘setPins’ function to write the text to the screen. When actually writing to the screen it is important to set the RS pin to ‘data input mode’ by setting it to ‘True’, otherwise it is in ‘instruction mode’ and won’t display anything on the screen. This is how it looks:

Function to write text to the LCD screen in Python
Once the functions have been created all that is left is to test them out by actually calling them in the code with some test data:
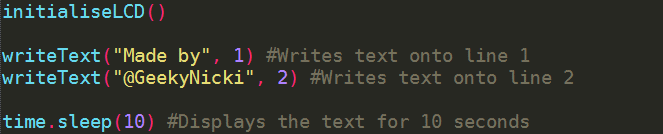
Calling the functions with some text to test out
I’m hoping to update this program with some additional functionality such as scrolling text and maybe transition effects. If you have any other ideas please comment below! For now though, I’m going to play with some of my other Christmas presents, which include BrickPi, MakeyMakey and Dead Rising 3 . . .
The full Python program for the LCD screen can be downloaded from GitHub. Happy coding and Happy New Year! 🙂
Hi! Nice project!! Very clever and also very useful. Please, could u tell me how did u make the wiring diagram of the raspberry pi? It’s incredibly well made. Thank u!!!
Hi! Thanks. It’s made using free software called Fritzing